RecyclerView in Kotlin
kotlin ·In my previous post, I spoke briefly about the magical Kotlin-Android-Extension plugin. So if you are reading my post for the first first, then do take a moment to include the kotlin-Android-Extension plugin in your build.gradle as I will not be declaring any UI elements in the Kotlin File. Also, if you are new to Kotlin, please follow this article from the official kotlin website to include the dependencies needed to get started with Kotlin.
Alright then, Without further ado, let’s build a list using RecyclerView in Kotlin.
Starting with the dependencies, Here is my build.gradle file. Observe that I am adding the dependency for RecyclerView.
apply plugin: 'com.android.application'
apply plugin: 'kotlin-android' //For Kotlin Support
apply plugin: 'kotlin-android-extensions' //For Not declaring UI Elements in the Activity

android {
    compileSdkVersion 25
    buildToolsVersion "25.0.3"
    defaultConfig {
        applicationId "com.basanthverma.potatolist"
        minSdkVersion 15
        targetSdkVersion 25
        versionCode 1
        versionName "1.0"
    }
    buildTypes {
        release {
            minifyEnabled false
            proguardFiles getDefaultProguardFile('proguard-android.txt'), 'proguard-rules.pro'
        }
    }
}

dependencies {
    compile fileTree(dir: 'libs', include: ['*.jar'])

    compile 'com.android.support:appcompat-v7:25.3.1'
    compile 'com.android.support:recyclerview-v7:25.3.1' //This dependency
    compile "org.jetbrains.kotlin:kotlin-stdlib-jre7:$kotlin_version"
}
repositories {
    mavenCentral()
}
After making changes in your build.gradle file, select “Sync now”. After it sync’s successfully we are good to go.
Let’s create an Activity file, right-click on your package name and choose New > Kotlin File/Class. I have named it MainActivity. We will come back to the Activity later. Let us goto the XML file called activity_main and create a RecyclerView under a Relative layout as follows:
<?xml version="1.0" encoding="utf-8"?>
<RelativeLayout xmlns:android="http://schemas.android.com/apk/res/android"
    xmlns:tools="http://schemas.android.com/tools"
    android:layout_width="match_parent"
    android:layout_height="match_parent"
    tools:context="com.basanthverma.potatolist.MainActivity">

    <android.support.v7.widget.RecyclerView
        android:id="@+id/potatolist"
        android:layout_width="match_parent"
        android:layout_height="match_parent"/>

</RelativeLayout>
The Cells in the RecyclerView also need a layout, let us create one XML file called potato_layout.xml as follows:
<?xml version="1.0" encoding="utf-8"?>
<LinearLayout xmlns:android="http://schemas.android.com/apk/res/android"
    android:orientation="vertical" android:layout_width="match_parent"
    android:layout_height="wrap_content">

   <TextView
        android:id="@+id/potatoTextView"
        android:layout_width="match_parent"
        android:layout_height="wrap_content"
        android:layout_margin="5dp"
        android:textAppearance="?android:attr/textAppearanceLarge"
        android:text="Sweet Potato"
        android:layout_gravity="center_horizontal" />
</LinearLayout>
A RecyclerView needs an Adapter to layout it’s cell according to the data source passed to it. So let us create a Kotlin Class called PotatoAdapter.kt
//Where's the Constructor? It's fused with the Class declaration :O
class PotatoAdapter(var c:Context, var list: ArrayList<String>) : RecyclerView.Adapter<RecyclerView.ViewHolder>() {

    override fun onCreateViewHolder(parent: ViewGroup?, viewType: Int): ViewHolder {
        val view = LayoutInflater.from(c).inflate(R.layout.potato_layout, parent, false)
        return Item(view)
    }

    override fun getItemCount(): Int {
        return list.size
    }

    override fun onBindViewHolder(holder: ViewHolder?, position: Int) {
        (holder as Item).bindData(list[position])
    }

    class Item(itemView: View) : RecyclerView.ViewHolder(itemView) {
        fun bindData(_name: String){
            //potatoTextView directly comes from the XML, thanks to the Kotlin-Android-Extension
            itemView.potatoTextView.text = _name
        }
    }

}
Now all we have to do is use the RecyclerView in the Activity. Below is the code of my MainActivity.kt :
class MainActivity : AppCompatActivity() {

    override fun onCreate(savedInstanceState: Bundle?) {
        super.onCreate(savedInstanceState)
        setContentView(R.layout.activity_main)

        //Again, Thanx to Kotlin-Android-Extension. No more findViewByID!
        potatolist.layoutManager = LinearLayoutManager(this)
        potatolist.hasFixedSize()
        //Creating the Adapter and passing the data source
        potatolist.adapter = FruitsAdapter(this, getLists())
    }

    //A potato datasource generator
    fun getLists():ArrayList<String> {
        var lists = ArrayList<String>()
        lists.add("Sweet Potato")
        lists.add("Fried Potato")
        lists.add("Alarmed Potato")
        lists.add("Mighty Potato")
        return lists
    }
}
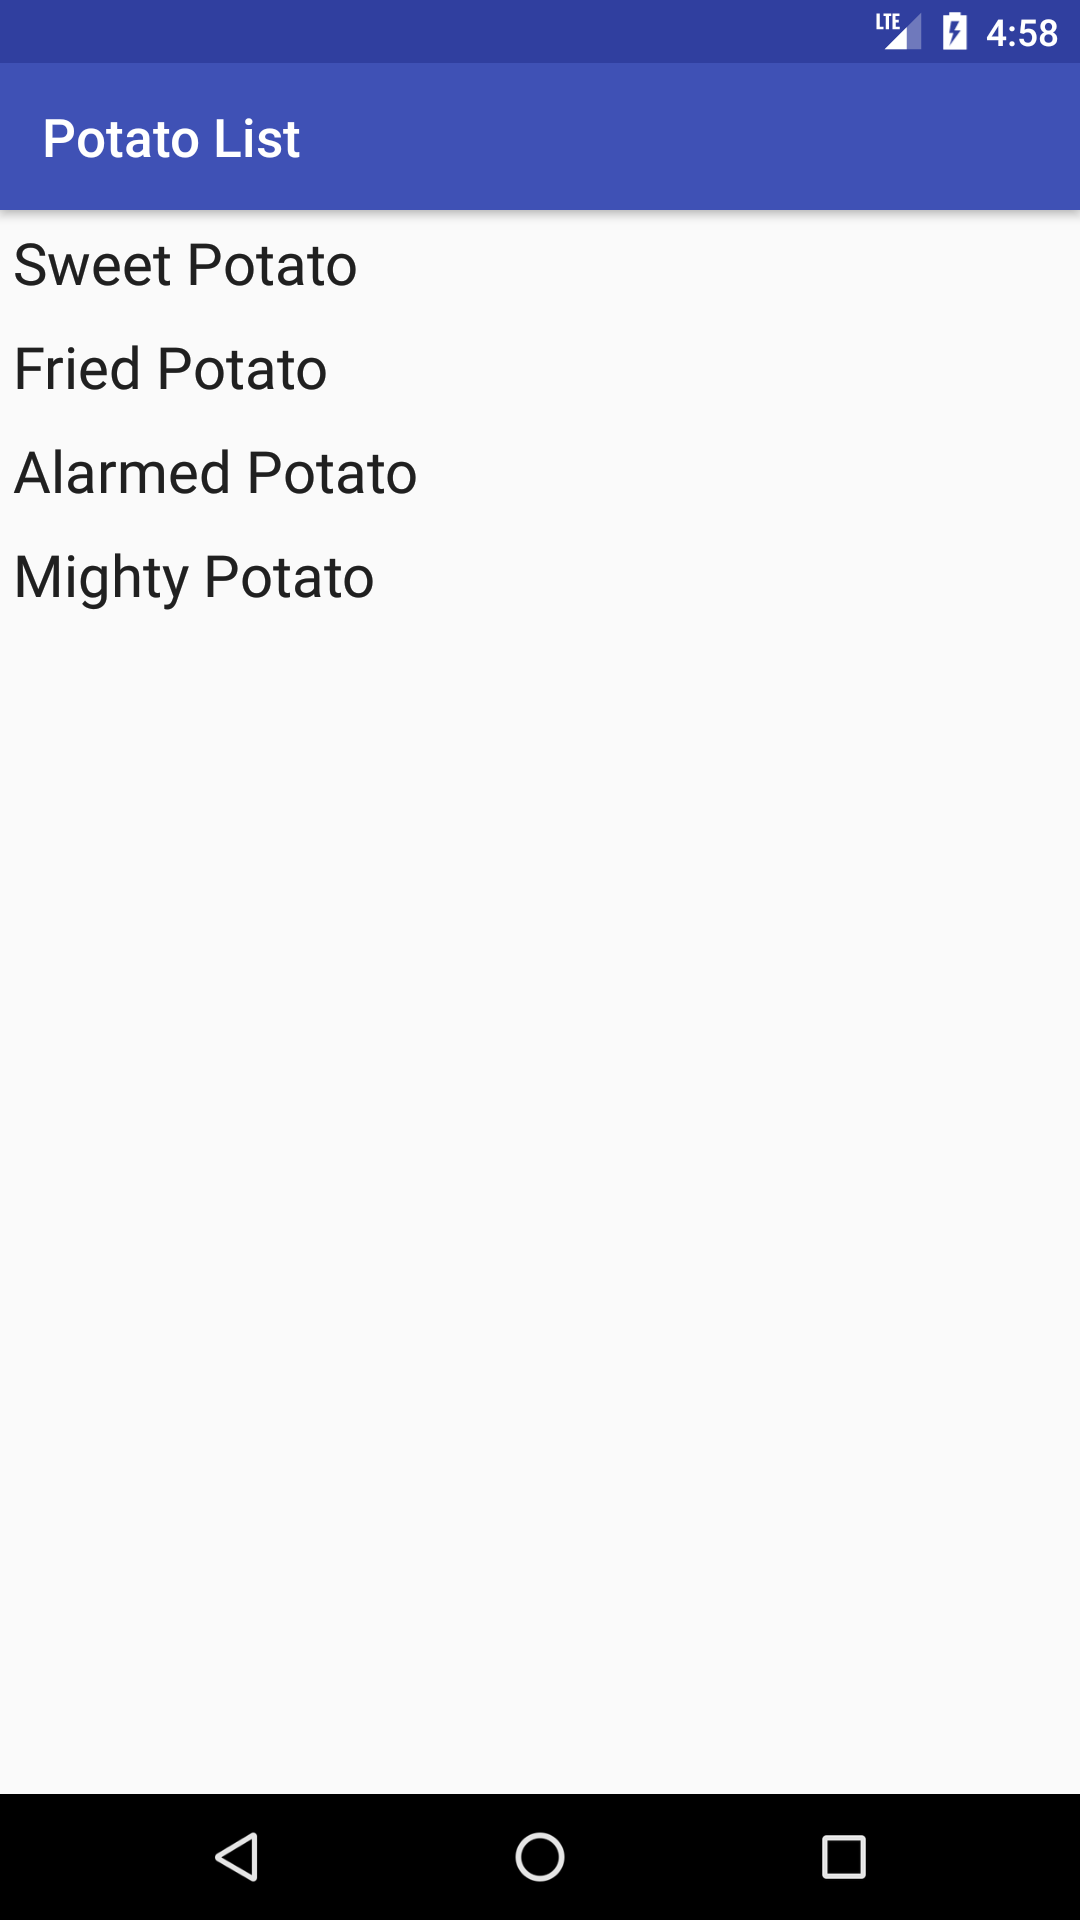
Build and run the project, you should see the Potato list app as shown below:

If you’re stuck anywhere, let me know in the comments below. Meanwhile I’m busy doing the Potato dance.

